If you haven’t read about the latest round of updates, the Simple Booth platform is becoming more and more robust. We want to make sure our customers are always getting the most out of their Simple Booth software.
Collecting customer marketing data is one of many awesome features of the Simple Booth platform. In this post, we’ll walk you through the process of setting up custom forms in the Simple Booth dashboard to collect customer marketing data. This valuable data will bolster your marketing strategy and help you connect with your customers in new ways.
Further Reading: Is Photo Marketing The Next Big Trend?
So, let’s not waste any time—here’s how to set up Simple Booth HALO® and harnesses the full power of the platform’s customer data capture capabilities.
How to set up your customer data capture form
To start, we made a helpful video that outlines the entire process. Take a look at the video on top of this page. We’ll also walk through the steps below for quick reference. Let’s get started!
Set up custom data fields
1. Log into your Simple Booth dashboard and select the App Presets tab found at the top of the page.
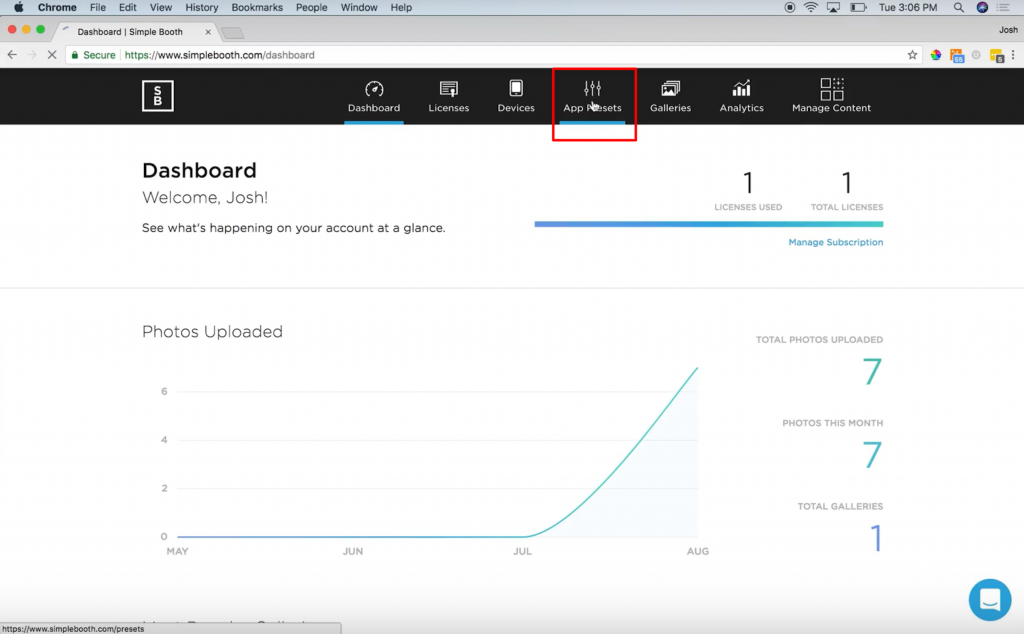
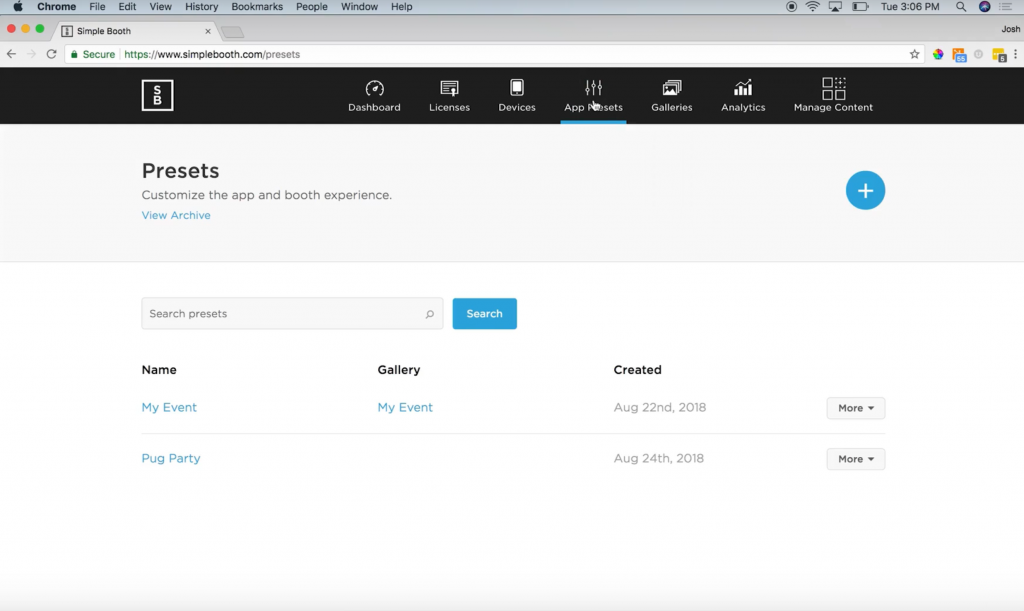
2. Select the preset you want to set up a custom form for.
3. Scroll down to the Data Capture section and click the checkbox to turn it on.
4. Fill in the Title and Info data fields.
- Title: This heading will show up on the data collection window your customers will see during your activations. Make it catchy!
- Info: This will also be visible to your customers. You have the option to keep it short and simple or get creative with it! But, as Josh mentions in the video, remember that you always have to let people know you are collecting their data.
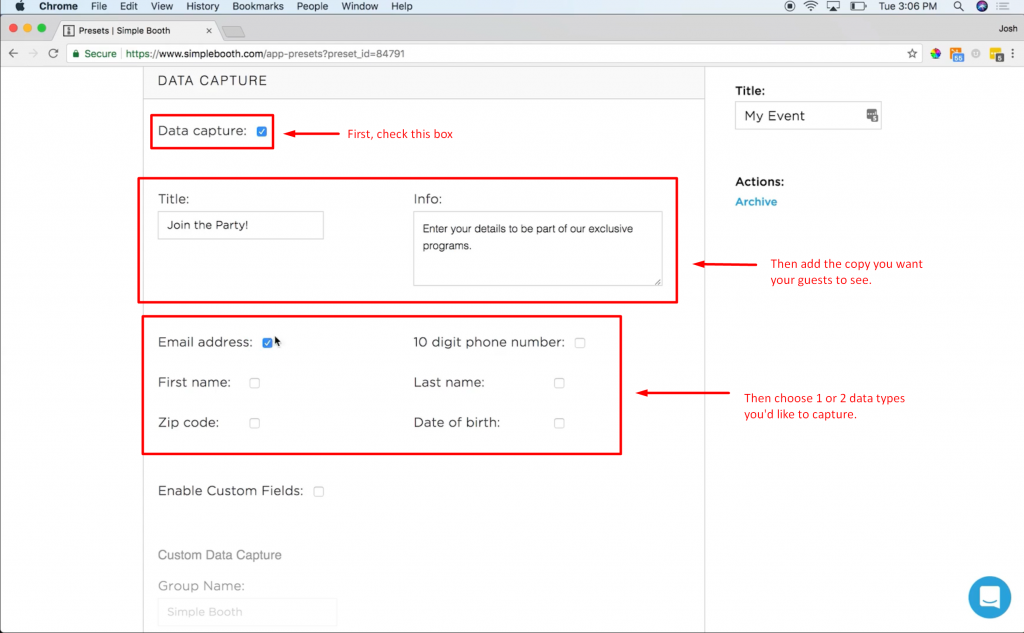
5. Check the boxes for each type of data you want to collect from your customers.
- You can choose between email address, phone number, first and last name, zip code, and date of birth.
- The email and phone fields will send the images to the customer. If both fields are checked, a copy of their photo will be sent to their email as well as their phone.
Best Practices: It’s tempting to choose multiple data capture options, but in our experience, it’s best to limit it to one or two. People are often in a hurry to get to their photos—keeping this step quick gives them a better user experience.
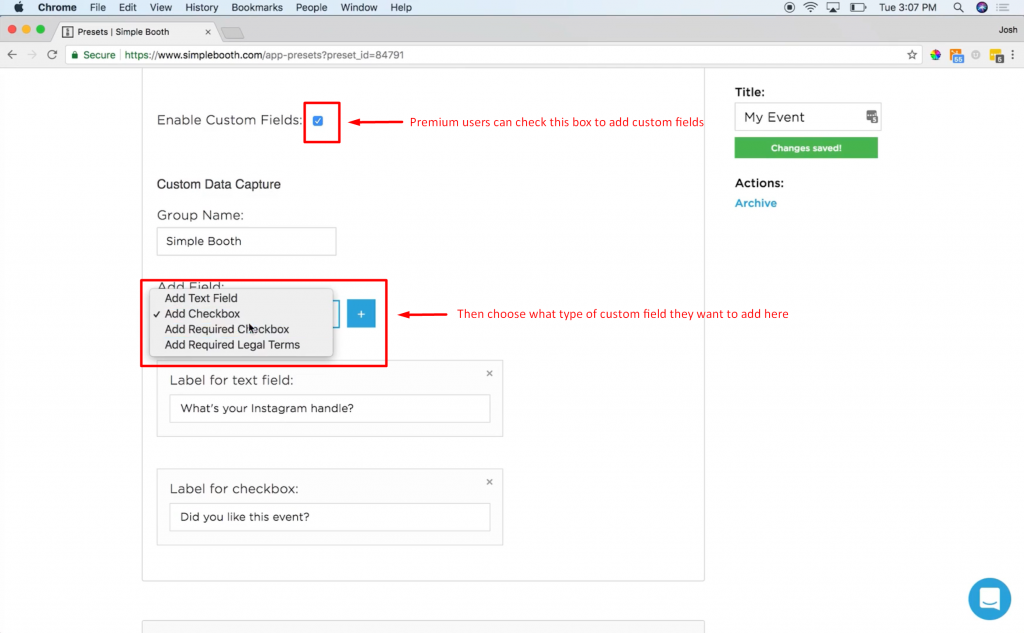
6. Add custom data capture fields (optional). If you have a Pro Simple Booth subscription, you’ll also have the option to add custom data capture fields. These fields are great for gathering more information from your customers.
There are options to add :
- Text input: You can ask the customer to type in their answers to any question you add. For example, Josh added a custom field asking, “What’s your Instagram handle?”
- Checkbox: Ask customers a simple question that can be answered with a simple check of a box. If the box is checked by a user, it implies a “Yes” answer. If the box is left unchecked, it implies a “No” answer.
- Required checkbox: Similar to the first checkbox option, but a required checkbox must be filled out before a customer can get their photo. A popular thing to add here is an opt-in box that says something like, “Do you allow us to use your photo in marketing materials?”
That’s really all it takes to set up a sweet customer data capture campaign during your Simple Booth activations.
Further Reading: 15 Examples Of Experiential Marketing In Action
Do a quick test
So, once you’ve got everything just the way you want it in the admin panel, jump over to the Simple Booth app and give it a test run.
You’ll take a photo just as your guests would, add your edits and filters to the image, then you’ll be prompted to fill in the customer data fields you just set up.
The data capture screens your customers will see will look something like this:
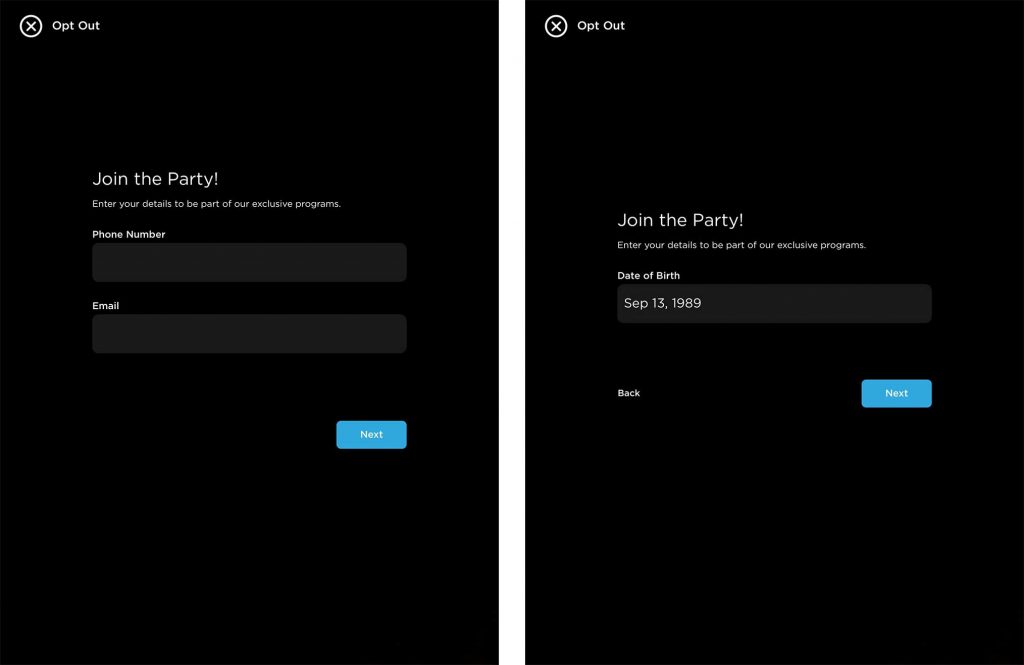
If they select the Opt-Out option in the upper-right hand corner, they will be presented with the screen below. It includes options to get their image without having their data captured.
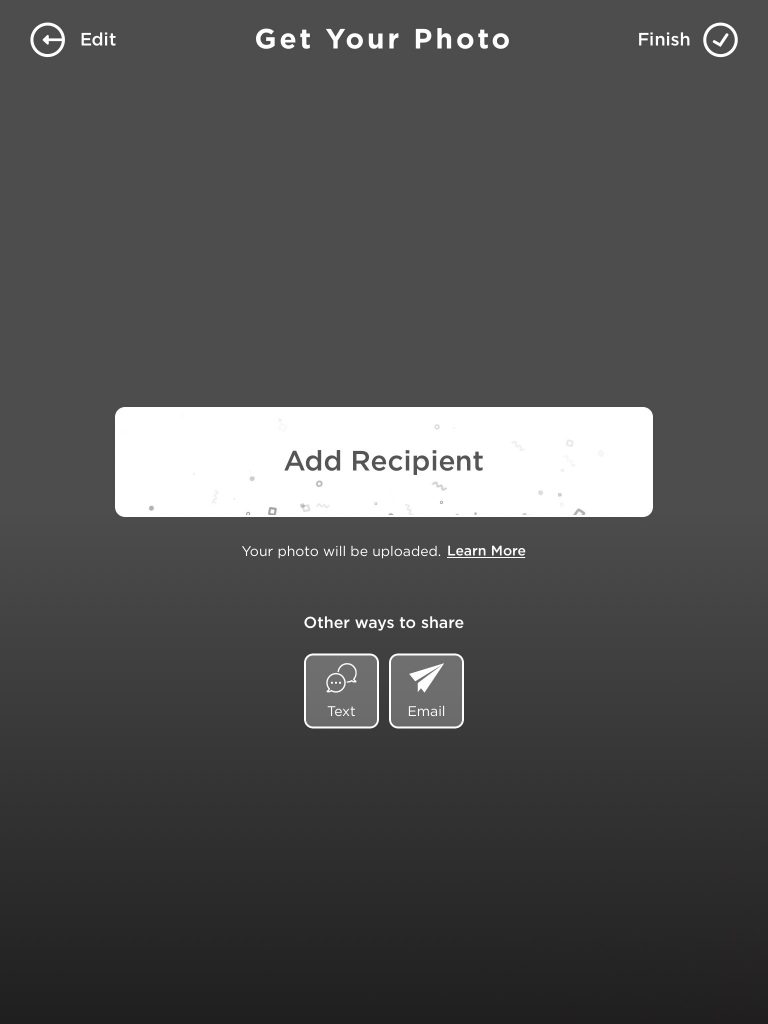
After that, the photo will be sent out to the proper recipient. If there was any data collected it will also become available in the Simple Booth dashboard at that time.
Confirm everything is working and looks great, then you’re officially all set.
Further Reading: 9 Books You Can Use To Create An Experiential Marketing Strategy
Make the most of customer data
With data analytics becoming a top priority in modern business, it’s worth utilizing all the metrics the Simple Booth platform brings you—not just the custom fields! There are additional metrics available to Pro Simple Booth subscribers, too.
For example:
Aside from the customer data you’ll be capturing in the fields we just set up above, the Simple Booth platform also collects a number of other metrics for you. For example, Simple Booth is able to report back social media analytics as well as consumer demographics like age, gender, and location of your Simple Booth participants.
Learn how customer data drives marketing strategies
At Simple Booth, we get to hear a lot of success stories about how our clients are able to grow their businesses using the metrics they’ve collected using our platform.
The option to capture customer data really ups the usefulness. You have the possibility to fully customize the data you’re gathering and use it to build out your data-driven marketing strategy.
One example of this is Pernod Ricard, a global alcoholic beverage dealer who uses their Simple Booth HALO to grow their email marketing program. One feature that really helped the brand was how easy Simple Booth made it to age-gate their consumer data collection by filtering out any person under the age of 21.
Using the Simple Booth platform, Pernod Ricard saw a BIG jump in their conversion rates. In fact, it skyrocketed to more than 90% after signing up thousands of new consumers to their email marketing list during their Simple Booth HALO activations.
Want to learn more about how Simple Booth can help your business?